Hobby Master 1/72 Air Power Series
HA1202
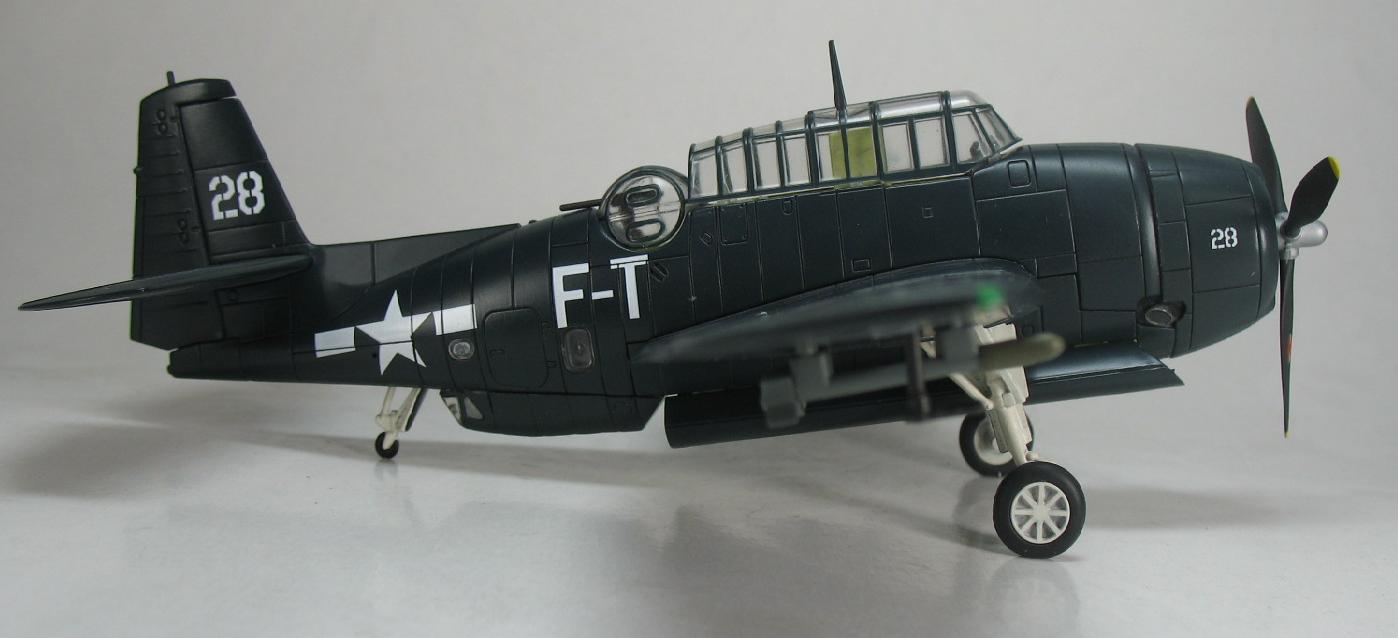
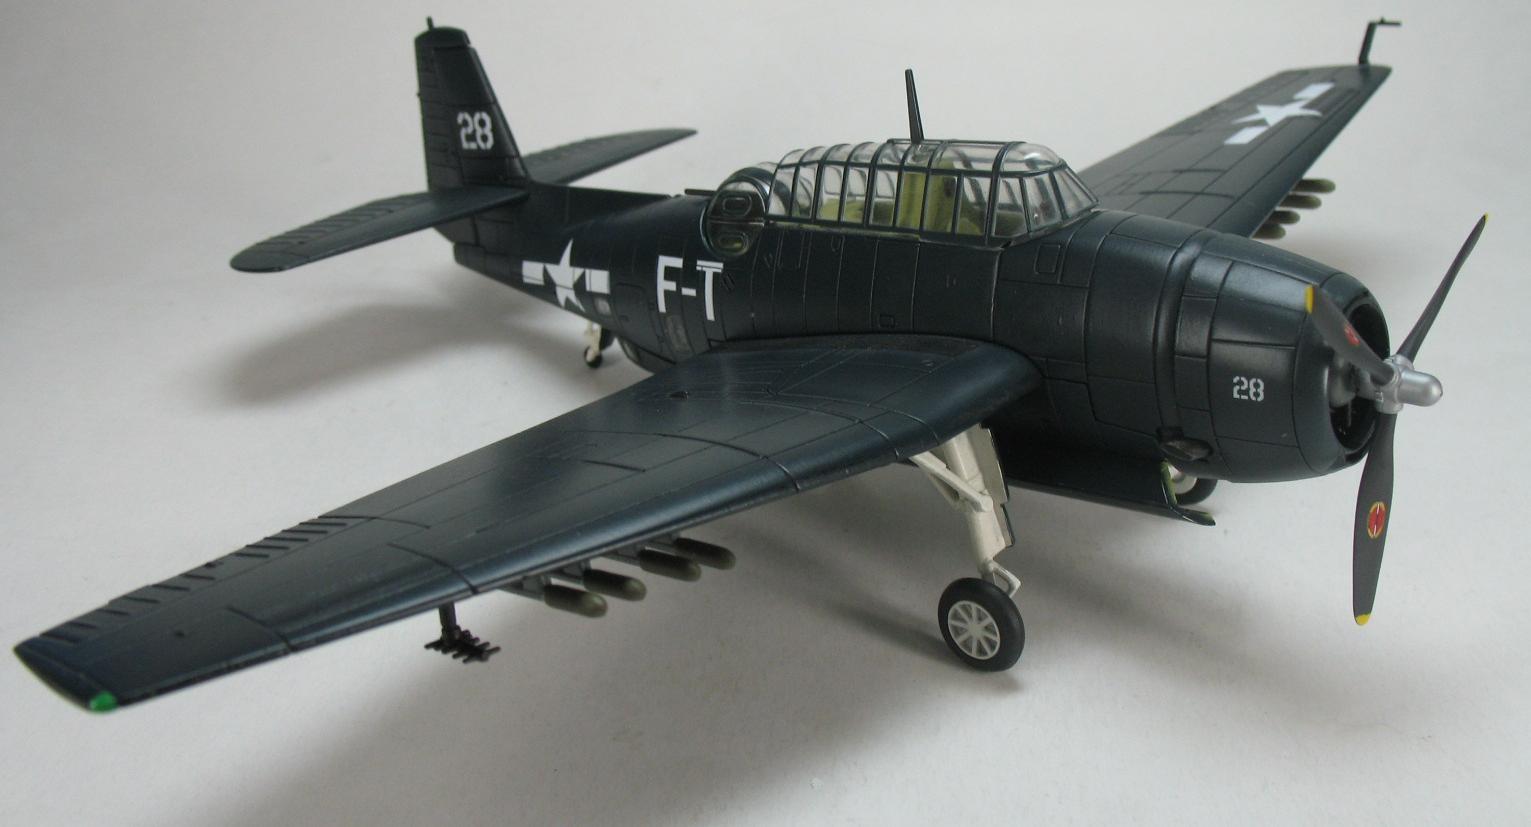
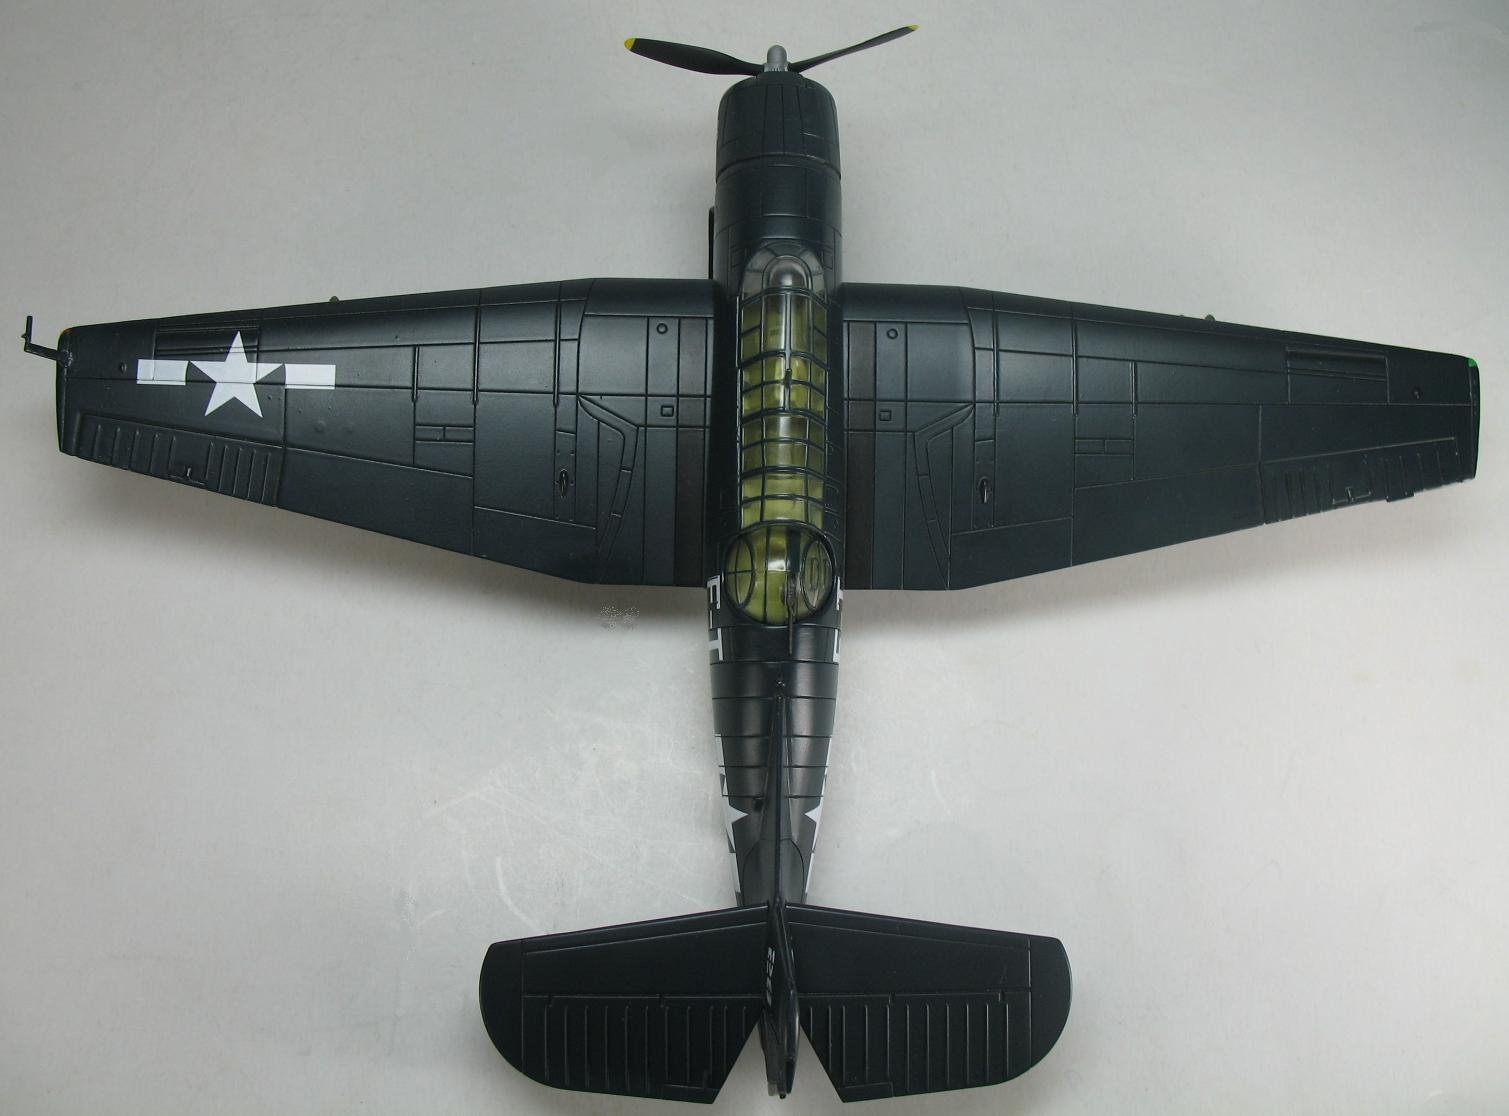
TBM-3, Squadron 79M
“Flight 19”, "The Lost Squadron"
|
History behind Flight 19
Flight 19, five USN TBM Avenger torpedo bombers from Fort Lauderdale NAS which
disappeared on a training exercise December 5, 1945. The aircraft and crew members
were never found, along with a PBM Mariner seaplane and a crew of 13 that was sent to
look for the missing Avengers. A ship’s captain said that there was an explosion in the
area of his ship and that they had sailed through an oil slick but there were no signs of
wreckage or the crew. The ships location was in the same area where the PBM would
have been so it was assumed that the explosion and oil was from that flight.
The Avengers were to depart and navigate to specific points and do a low level bombing
strafing practise along the way and then fly to other points and return to Ft. Lauderdale.
The instructor was Lt. Charles Taylor who saw combat in the Pacific Theater and had
over 2500 hours of flight experience. He hadn’t been at the base very long and wasn’t
familiar with the region and it’s geography which pilots of that era used to help with
navigation. To make matters worse it is said that Taylor had a history of becoming lost
and had ditched 3 airplanes in the Pacific.
All the planes were pre-flight checked and fueled for a minimum of 5 hours of flying.
Upon departure the weather was acceptable but the seas were moderate to rough. It was
normal procedure for a trainee pilot to assume lead and the instructor would follow to
keep a watchful eye on the entire flight and would take over if a problem developed.
From crew radio conversations monitored by the base and other aircraft the bombing
portion of the flight was successful but not long after making the turn on to their second
leg it was becoming clear that the flight was lost and Lt. Taylor assumed the lead. While
monitoring of the conversations continued it became clear that Lt. Taylor was the only
one who thought they were lost he reported that both of his compasses weren’t working.
The student pilots were quite familiar with the area and didn’t agree with the Lt. Taylor,
they believed they were exactly where they should have been but they followed the
instructors lead. Taylor radioed a senior flight instructor who was flying in the area and
told him he thought they were over the Florida Keys. He was advised that if he was
certain he was over the Keys to fly with the sun off if port wing and he would fly up the
coast to Ft. Lauderdale. Weather began to worsen and radio contact became intermittent
but it is known that Taylor had argued with one of the other members of the flight who
insisted that they should fly west until they made land or ran out of fuel. This probably
would have been the correct thing to do but it was too late to correct Taylor’s mistake,
the flight possibly was well out to sea by this time. The one definite thing Taylor should
have done was fly west north west this would have taken him to land no matter where he
was.
Further transmissions heard Taylor saying that the flight should turn around and fly back
in the direction they had just come from. In the transmission he was very indecisive and
his conversation was more of a suggestion and not an order so it was obvious he was
not in command. The next transmission was for the flight to tighten up and that they may
have to ditch in the ocean when the first plane only had ten gallons of fuel left, “we all go
down together”. That was the last ever heard from Flight 19, Squadron 79M.
U.S. Navy investigators concluded the obvious, that Flight 19 had become disoriented
and ditched at sea when the aircraft ran out of fuel. Some questioned the explanation,
doubts which helped develop the Bermuda Triangle legend.
History behind the Grumman Avenger
On the afternoon of December 7, 1941, Grumman opened a new manufacturing plant and
held a ceremony to show off the new TBF to the public. Ironically this is the same “Day
that will live in infamy” when the Imperial Japanese Navy attacked Pearl Harbor. After the
ceremony, the plant was quickly sealed off to prevent any possible enemy action.
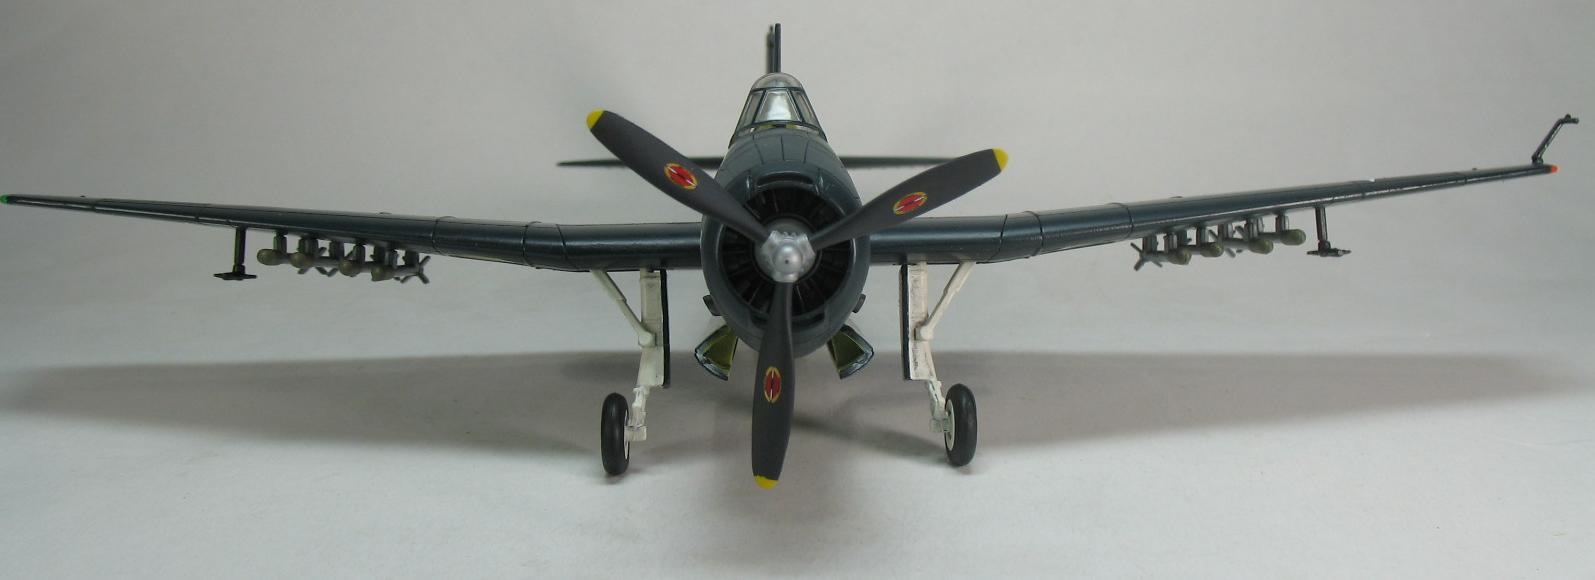
Grumman's first torpedo bomber was the heaviest single-engine plane of WWII, and it was
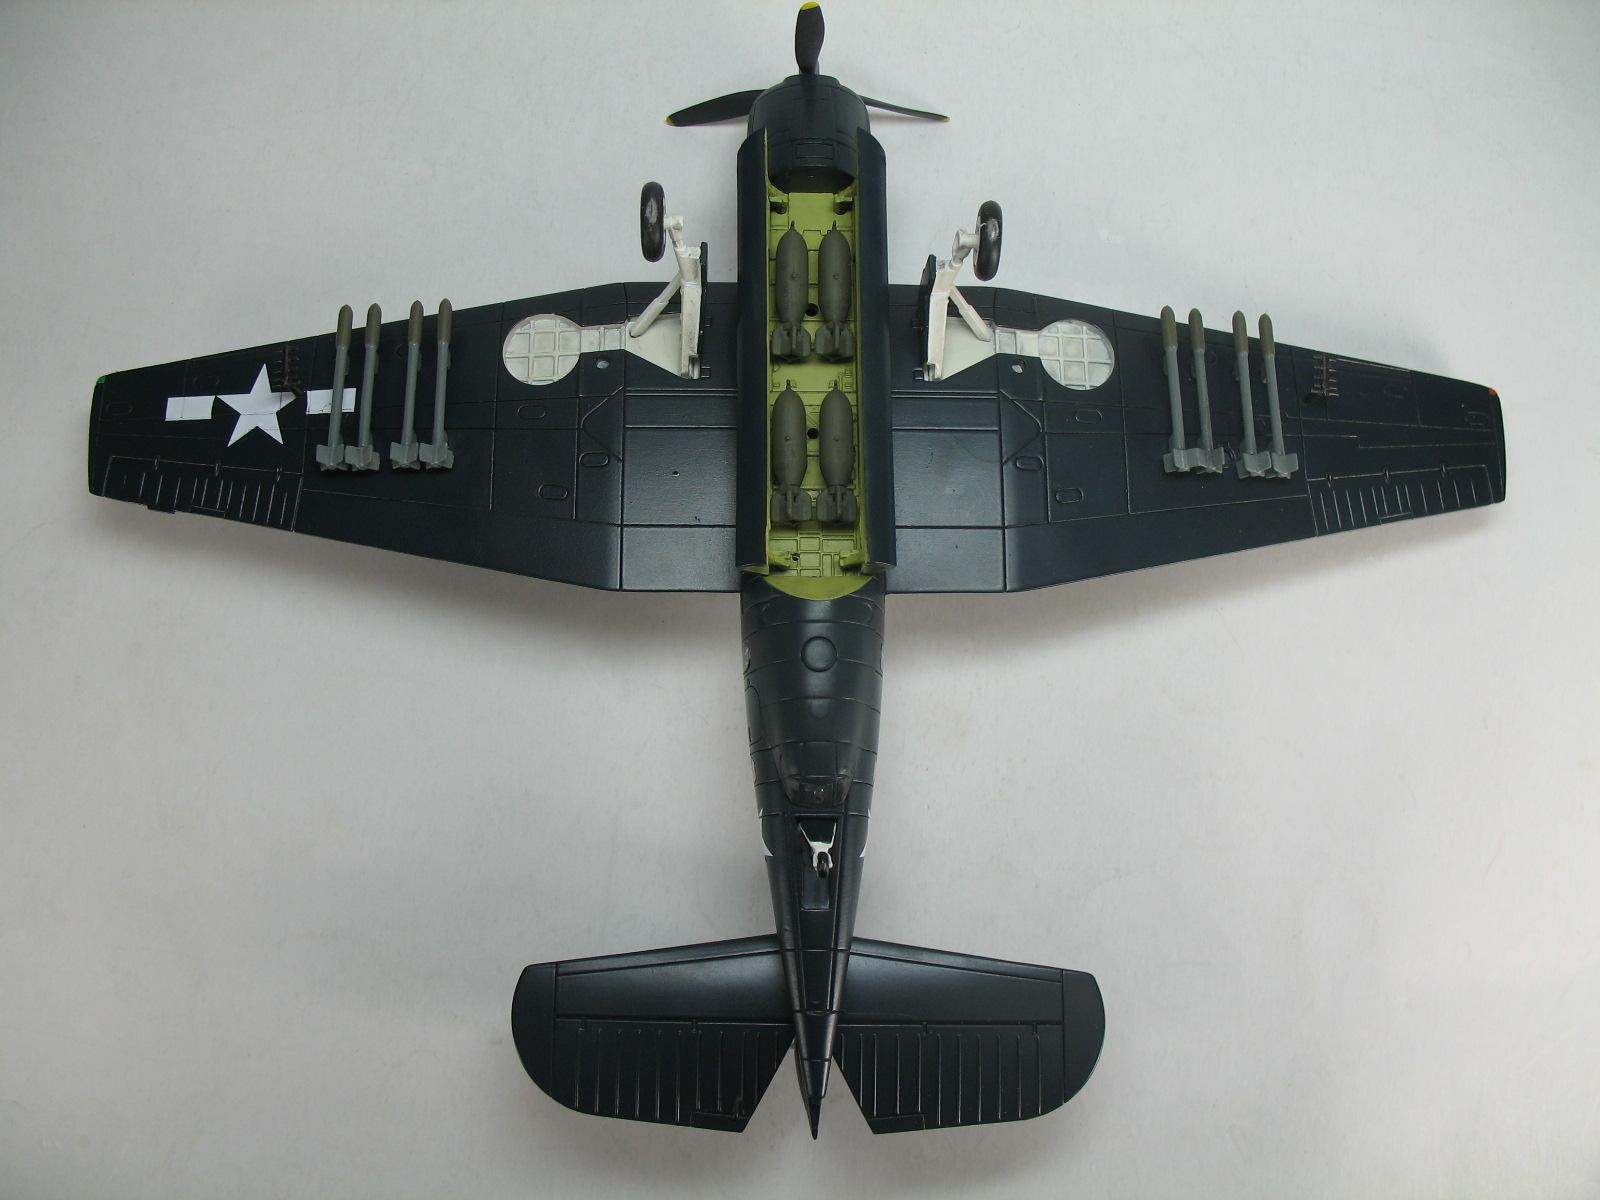
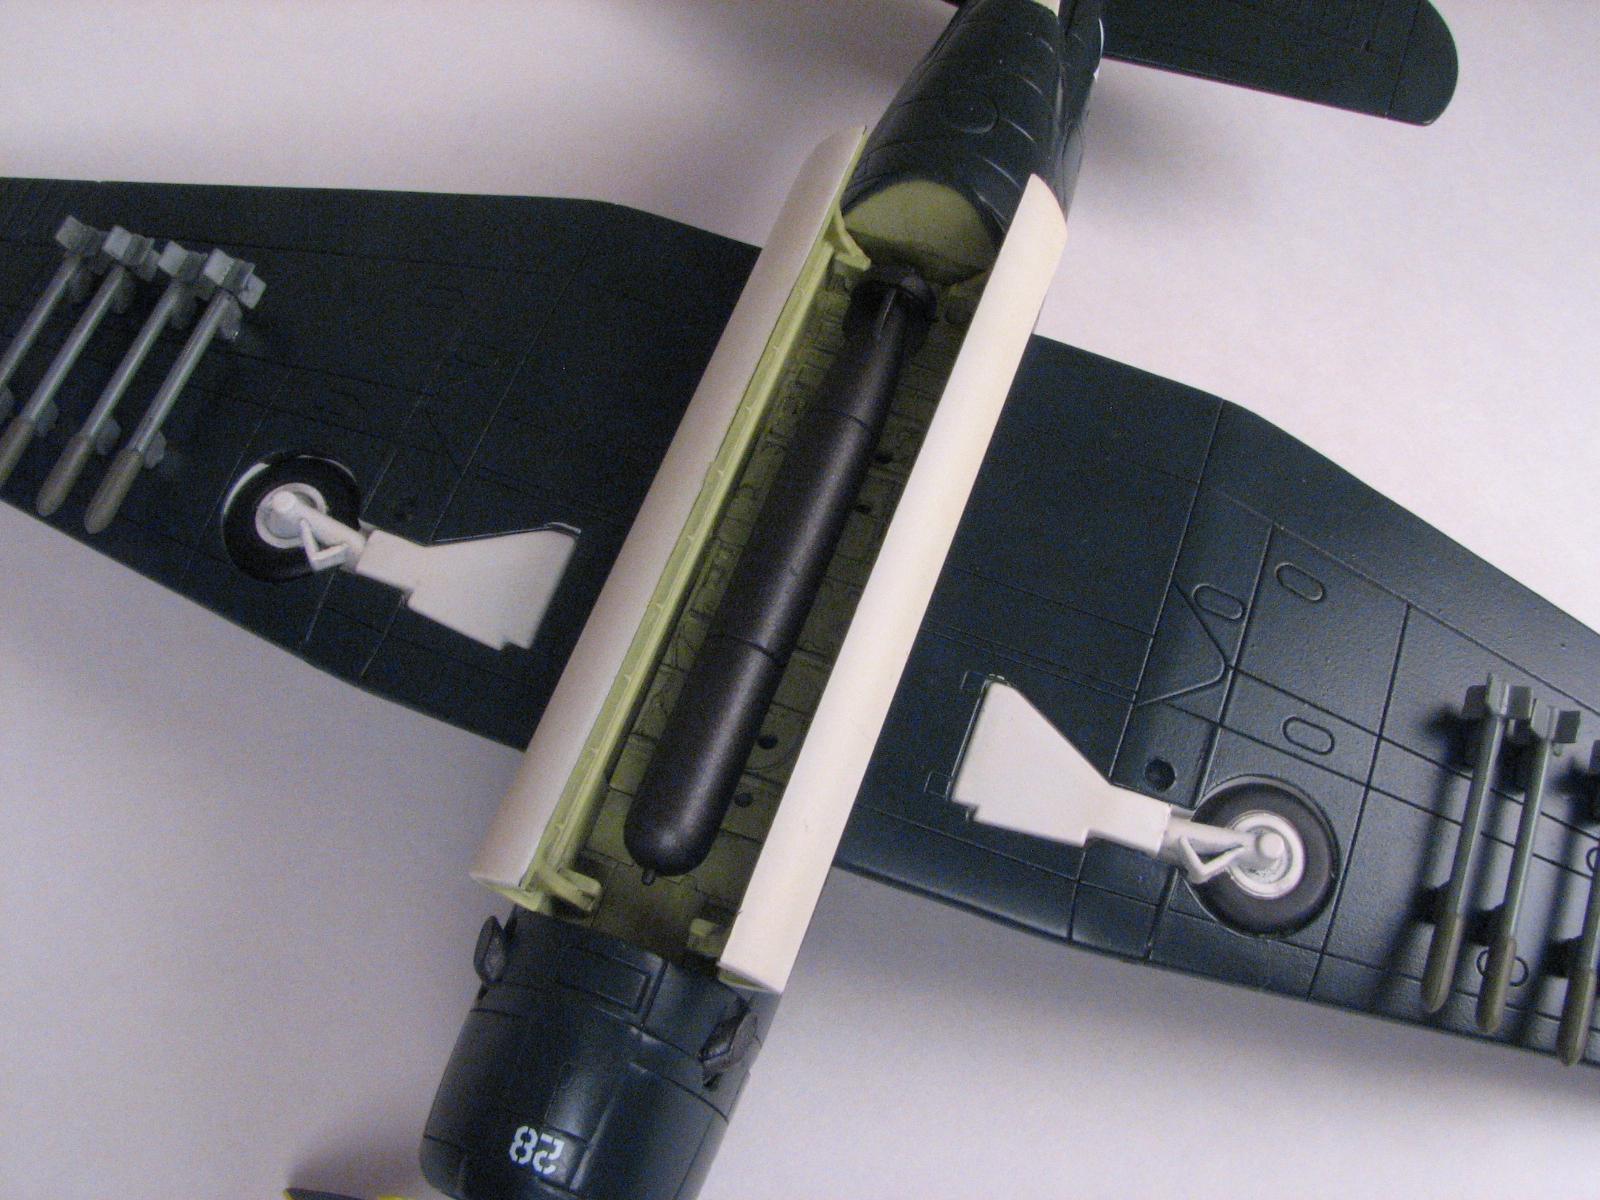
the first to feature a new Grumman designed folding wing mechanism that would greatly
increase storage space on an aircraft carrier. Another Grumman aircraft to utilize this
folding wing was the F6F Hellcat. There were three crew members—pilot, turret gunner,
and radioman/bombardier/ventral gunner. Equipped with a .50-caliber machine gun in
each wing, one .50 caliber gun mounted right next to the turret gunner's head in a rear-
facing electrically-powered turret. A single .30 caliber hand-fired machine gun mounted
under the tail was available to defend against enemy fighters attacking from a below and
to the rear. This gun was fired by the radioman/bombardier while standing up and
bending over in the belly of the tail section but he usually sat on a folding bench facing
forward to operate the radio and to sight in bombing runs. Equipped with a large bomb
bay the Avenger could hold a torpedo, a single 2000 lb bomb, or up to four 500 lb bombs.
By 1944, it was rare for American aircraft to encounter enemy shipping so the Avenger
was used mostly as a ground support weapon.
The most notable features of the Avenger was its ruggedness and ease of handling best
described by the pilots as flying a truck. Along with the normal role of torpedoing surface
vessels Avengers sent some thirty submarines to the bottom. One such sub was the
cargo submarine I-52 whose wreck was located in 1998. Recognized as one of the most
effective sub killers in the Pacific the Avenger was put to work in the Atlantic protecting
convoys from U-boats once Escort Carriers were made available.
The Avenger was also used by the Royal Navy's Fleet Air Arm where it was first known as
the "Tarpon" but eventually was referred to as the Avenger. The first 402 aircraft were
known as Avenger Mk 1, 334 TBM-1s were the Avenger Mk II and 334 TBM-3 as Mark III.
Post war the antisubmarine version was the "Avenger AS Mk IV" in RN service.
One other military used the Avenger in WWII, the Royal New Zealand Air Force operating
from South Pacific islands as bombers.
Hobby Master Grumman
Avenger:
Hobby Master gives you this
stunning example of aviation
history. The tragic loss of life
while flying one of the greatest
planes of WWII. You will be
amazed at the level of detail
and superb paint and markings
applied to this model. Every
effort has been made to
present you with a remarkable
model of a remarkable plane.
This definitely is one model
you will want for your collection.
THIS IS A PICTURE OF A
PRE-PRODUCTION MODEL JUST
TO SHOW YOU WHAT THE
MODEL LOOKS LIKE WITH A
TORPEDO. THE WHITE DOORS
AND WHEEL COVERS WILL BE
BLUE ON THE RETAIL VERSION
LIKE THE OTHER PICTURES ON
THIS PAGE
THESE ARE PRE-PRODUCTION
PICTURES NOT THE RETAIL VERSION
|
Specifications for the Avenger
Crew: 3
Dimensions -
Length: 40 ft. 11.5 in. (12.48 m)
Wingspan: 54 ft. 2 in. (16.51 m)
Height: 15 ft. 5 in. (4.70 m)
Wing area: 490.02 ft. sq. (45.52 m sq.)
Weight -
Empty: 10,545 lb. (4,783 kg)
Loaded: 17,893 lb. (8,115 kg)
Power plant: 1 Wright R-2600-20 radial engine producing 1,900 hp (1,420 kW)
Performance -
Maximum speed: 276 mph (444km/h)
Range: 1,000 miles (1,610 km)
Service ceiling: 30,100 ft (9,170 m)
Rate of climb: 2,060 ft/min (10.5 m/s)
Wing loading: 36.5 ft-lbf sq (178 kg/m sq)
Armament -
1x 0.30 cal (7.62 mm) nose-mounted machine gun
2 x 0.50 cal (12.7 mm) wing-mounted machine guns
1 x 0.50 cal (12.7 mm) dorsal-mounted machine gun
1 x 0.30 cal (7.62 mm) ventral-mounted machine gun
Up to 2,000 lb (900 kg) of bombs
1 x 2,000 lb (900 kg) torpedo
|
|